
If you’ve ever been right in the middle of updating QuickBooks — maybe payroll, maybe the software itself — and suddenly hit a wall with a message that says something like “Error 12031: A connection to QuickBooks has been lost,” you know exactly how frustrating that moment is. You’re not sure if your update went through, whether your data is safe, or what broke in the first place.
The good news? This is one of the more fixable QuickBooks errors out there. It’s almost always related to your internet connection or how your system’s security software is talking (or not talking) to Intuit’s servers. This guide walks you through everything — what the error actually means, why it happens, and step-by-step fixes that actually work.
No fluff. Let’s get into it.
Read: How to Fix QuickBooks Online Not Sending Invoices
What Is QuickBooks Error 12031?
QuickBooks Error 12031 is a network timeout error. It falls under the 12000 series of errors, which are all related to internet connectivity issues within QuickBooks Desktop.
When QuickBooks tries to connect to Intuit’s update servers and the connection drops, times out, or gets blocked halfway through, you get Error 12031. The full error message usually reads something like:
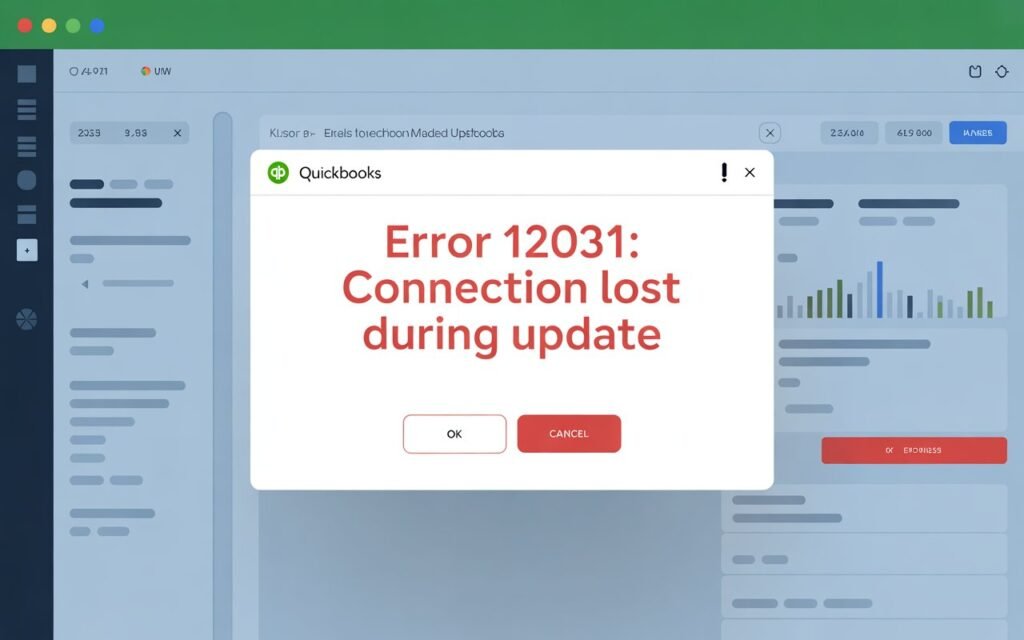
“QuickBooks has encountered a problem on the Internet. Error 12031.”
Sometimes it appears as:
“Error 12031: A connection to QuickBooks has been lost.”
This can happen during:
- QuickBooks software updates (when you click Help > Update QuickBooks Desktop)
- Payroll updates (downloading the latest tax tables)
- QuickBooks Web Connector sync
- Connecting to Intuit’s servers for any reason
It does NOT mean your QuickBooks data file is corrupted. It’s a network-layer error — your program just couldn’t complete its handshake with the internet.
Why Does Error 12031 Happen?
Understanding the “why” helps you pick the right fix faster. Here are the most common reasons:
1. Unstable or dropped internet connection
The simplest explanation: your internet connection hiccupped at exactly the wrong time. QuickBooks is strict about maintaining a stable connection during updates.
2. Firewall or antivirus blocking QuickBooks
Your Windows Firewall, antivirus software, or corporate network firewall might be preventing QuickBooks from reaching Intuit’s servers. This is actually the #1 cause of Error 12031 in most business environments.
3. Incorrect Internet Explorer settings
Yes, even in 2025-2026, QuickBooks Desktop still leans on Internet Explorer’s network settings under the hood (it uses the Windows networking stack, which historically was tied to IE). Incorrect or outdated IE settings can cause connectivity issues.
4. SSL settings misconfiguration
QuickBooks needs SSL 2.0 and SSL 3.0 to communicate with Intuit’s servers in some versions. If these are disabled system-wide, updates will fail.
5. Proxy server interference
If your business runs its internet through a proxy server, QuickBooks might not know how to route its connection correctly.
6. QuickBooks update server outage
Occasionally — though rarely — the issue is on Intuit’s end. A quick check of Intuit’s status page can rule this out.
Before You Start: Do These Quick Checks First
Before diving into technical fixes, spend 5 minutes on these basics:
- Restart your router and modem. Sounds obvious, but a fresh connection clears a lot of temporary network gremlins.
- Test your internet. Open a browser and load a few pages. If things are slow or spotty, that’s your answer.
- Check Intuit’s server status. Visit status.intuit.com to see if there’s a known outage.
- Run QuickBooks as Administrator. Right-click the QuickBooks icon and select “Run as administrator.” Limited permissions sometimes block update connections.
- Temporarily disable your antivirus. Just for testing purposes. If the update works with it off, the antivirus is your culprit and you can re-enable it after applying the proper exclusions.
Fix 1: Configure Internet Explorer Settings (Most Effective)
Even if you don’t use Internet Explorer as your browser, QuickBooks Desktop uses its network settings. Getting these right fixes Error 12031 in the majority of cases.
Step 1: Close QuickBooks completely.
Step 2: Open Internet Explorer (search for it in the Windows Start menu).
Step 3: Click the gear icon in the top-right corner and select Internet Options.
Step 4: Go to the Advanced tab and scroll down to the Security section. Make sure these boxes are checked:
- Use SSL 2.0
- Use SSL 3.0
- Use TLS 1.0
- Use TLS 1.1
- Use TLS 1.2
And make sure these are unchecked:
- Do not save encrypted pages to disk (if checked, it can interfere with Intuit’s servers)
Step 5: Click Apply, then OK.
Step 6: Now go to the Connections tab and click LAN Settings.
Step 7: Make sure “Automatically detect settings” is checked. If you’re not behind a proxy, make sure “Use a proxy server” is unchecked.
Step 8: Click OK on everything, restart QuickBooks, and try your update again.
This fix alone resolves Error 12031 for most users.
Fix 2: Add QuickBooks to Your Firewall Exceptions
If Fix 1 didn’t fully solve it, your firewall is likely still blocking QuickBooks from reaching Intuit’s update servers. Here’s how to handle that.
For Windows Firewall:
Step 1: Open the Start menu and search for “Windows Defender Firewall” and open it.
Step 2: Click “Allow an app or feature through Windows Defender Firewall” on the left side.
Step 3: Click “Change settings” (you’ll need admin rights), then click “Allow another app.”
Step 4: Browse to your QuickBooks installation folder. The default location is usually:
C:\Program Files (x86)\Intuit\QuickBooks [Year]\
Add these files as exceptions:
- QBW32.exe (the main QuickBooks program)
- QBUpdate.exe (the update program)
- QBDBMgrN.exe (database manager)
- FileManagement.exe
- FileMovementExe.exe
- AutoBackupExe.exe
Step 5: For each file, make sure both Private and Public network boxes are checked.
Step 6: Click OK and try updating QuickBooks again.
For Third-Party Antivirus (Norton, McAfee, Avast, etc.):
The exact steps vary by software, but generally:
- Open your antivirus dashboard
- Find Exceptions, Exclusions, or Trusted Applications
- Add the entire QuickBooks folder (C:\Program Files (x86)\Intuit\QuickBooks [Year]\) as an exclusion
- Also exclude the QuickBooks data folder if prompted
Fix 3: Use QuickBooks Tool Hub — Clean Install & Repair
Intuit built a free utility called QuickBooks Tool Hub specifically for fixing common QuickBooks errors. If your error is stemming from corrupted QuickBooks files rather than network settings, this is the right tool.
Step 1: Download the latest version of QuickBooks Tool Hub from Intuit’s official website.
Step 2: Install it and open it.
Step 3: Click on “Network Issues” in the left-hand menu.
Step 4: Click “QuickBooks File Doctor.” This tool will scan your setup and attempt to fix connectivity and company file issues.
Step 5: After it finishes, try your update again.
If that doesn’t work, go back to Tool Hub and click “Program Problems,” then select “Quick Fix my Program.” This restarts QuickBooks processes and clears temporary files that might be interfering.
Fix 4: Reset QuickBooks Update Settings
Sometimes the update settings inside QuickBooks itself get stuck in a bad state. Resetting them gives you a clean slate.
Step 1: Open QuickBooks and go to Help > Update QuickBooks Desktop.
Step 2: Click on the Options tab.
Step 3: Click “Mark All” to ensure all update components are selected, then click Save.
Step 4: Go to the Update Now tab and check “Reset Update.”
Step 5: Click “Get Updates.”
This forces QuickBooks to re-download everything fresh, discarding any partial or corrupted update files that might have been left behind from a previous failed attempt.
Fix 5: Check Your Date, Time, and Time Zone Settings
This one surprises a lot of people, but QuickBooks and Intuit’s servers validate SSL certificates during connections — and SSL certificates are time-sensitive. If your system clock is off by more than a few minutes, or if your time zone is wrong, the certificate validation fails and your connection drops.
Step 1: Right-click the clock in your Windows taskbar and select “Adjust date/time.”
Step 2: Make sure your date, time, and time zone are all correct.
Step 3: Enable “Set time automatically” if it isn’t already.
Step 4: Restart QuickBooks and try again.
Fix 6: Flush DNS and Reset Network Stack
If you’re on a Windows machine that’s been running a while without a restart, stale DNS cache entries can cause connectivity problems that look exactly like Error 12031.
Step 1: Open the Command Prompt as Administrator (search for “cmd,” right-click, “Run as administrator”).
Step 2: Type each of these commands, pressing Enter after each one:
ipconfig /flushdns
ipconfig /registerdns
ipconfig /release
ipconfig /renew
netsh winsock reset
Step 3: Restart your computer.
Step 4: Open QuickBooks and try the update again.
Fix 7: Configure QuickBooks to Use a Direct Internet Connection
If your business uses a proxy server for internet access, QuickBooks might need to be configured to bypass it for update connections.
Step 1: In QuickBooks, go to Help > Internet Connection Setup.
Step 2: Select “Use my computer’s Internet connection settings to establish a connection when this application accesses the Internet.”
Step 3: Click Next, then Done.
If you need QuickBooks to work through your proxy, select the second option and enter your proxy details. Contact your IT team for those credentials if you don’t have them.
Fix 8: Perform a Clean Reinstall of QuickBooks
If every fix above has failed and Error 12031 keeps showing up, there may be underlying installation issues with QuickBooks itself — corrupted files, incomplete past updates, or registry conflicts.
A clean reinstall is more involved, but it almost always fixes persistent errors.
Step 1: Before anything, back up your company file. Go to File > Back Up Company > Create Local Backup. Don’t skip this.
Step 2: Uninstall QuickBooks via Control Panel > Programs > Uninstall a program.
Step 3: Use the QuickBooks Clean Install Tool (available in QuickBooks Tool Hub under “Installation Issues”) to clear out leftover files and folders.
Step 4: Rename the QuickBooks installation folders that remain. Change:
- C:\Program Files\Intuit\QuickBooks [Year] → add .old at the end
- C:\ProgramData\Intuit\QuickBooks [Year] → add .old at the end
Step 5: Reinstall QuickBooks from your original installation disc or your Intuit account download.
Step 6: Restore your company file and attempt the update.
Specific Scenario: Error 12031 During Payroll Update
Payroll updates are particularly sensitive because they pull down tax table data from Intuit’s servers. If you get Error 12031 specifically when running payroll updates, try these additional steps:
- Make sure your QuickBooks Payroll subscription is active. An expired subscription can cause connection errors that mimic network failures.
- Go to Employees > Get Payroll Updates and select “Download entire payroll update” instead of incremental updates.
- If you have multiple users, make sure no one else is using QuickBooks on the network during the update attempt. Simultaneous access sometimes interferes with payroll server connections.
- Check that port 443 (HTTPS) and port 80 (HTTP) are both open on your firewall. Payroll updates specifically need these.
Error 12031 on Multi-User or Server Environment
If QuickBooks is running in a multi-user setup where the company file lives on a server, Error 12031 requires some extra attention:
On the server machine:
- Make sure QuickBooks Database Server Manager is installed and running
- Open ports 8019, 56726, 55368-55370 in your firewall
- Run QuickBooks Tool Hub’s Network Diagnostic tool on the server
On workstations:
- Each workstation should have its own QuickBooks installation
- Make sure all workstations are on the same network and can see the server
- Run updates from the server machine first if possible
How to Verify Your Fix Worked
After applying any of the fixes above, here’s how to confirm Error 12031 is actually gone:
- Open QuickBooks and go to Help > Update QuickBooks Desktop
- Click Update Now and let it run completely
- Watch the progress bar — if it completes without interruption and shows a success message, you’re good
- Then run a payroll update as a secondary test: Employees > Get Payroll Updates > Update
- If both complete successfully, your connection issue is resolved
Preventing Error 12031 From Coming Back
Once you’ve fixed it, here’s how to keep it from recurring:
Keep QuickBooks updated. Ironically, older versions of QuickBooks are more prone to connectivity errors. Keeping your software current ensures compatibility with Intuit’s servers.
Schedule updates during off-hours. Set QuickBooks to auto-update overnight (Help > Update QuickBooks Desktop > Options > Automatic Update). Updates during business hours compete with other network traffic.
Don’t run QuickBooks updates on VPN. If you or your employees connect via VPN, disable it before running QuickBooks updates. VPNs frequently cause timeout issues with QuickBooks.
Maintain your Windows updates. Windows security patches sometimes affect how network certificates are handled. An outdated Windows system can start causing SSL issues that didn’t exist before.
Create a QuickBooks backup schedule. Regardless of the error, regular automated backups mean you never lose work if something does go wrong mid-update.
When to Call QuickBooks Support
If you’ve worked through all of these fixes and still can’t get past Error 12031, it’s time to loop in Intuit support directly. This is especially true if:
- You’re on a corporate network with IT-managed firewall rules you can’t change yourself
- Your QuickBooks version is older than three years (some server endpoints for older versions have been retired)
- The error is accompanied by other errors like 12002, 12007, or 12029
You can reach QuickBooks Desktop support through your Intuit account or through the Help menu inside QuickBooks.
Final Thoughts
QuickBooks Error 12031 looks scarier than it is. The vast majority of cases come down to two things: either your firewall is blocking QuickBooks from calling home, or your Internet Explorer / Windows network settings need a tweak. Start with Fix 1 and Fix 2, and there’s a good chance you’ll be back to running updates within 20 minutes.
The key thing to remember is that this error has nothing to do with your financial data. Your books are safe. It’s purely a connection issue between your machine and Intuit’s servers — and connection issues are always fixable.
If you found a fix that worked for your specific situation that isn’t listed here, or if you’re still stuck after going through every step, drop a comment below. Real-world experiences from people running QuickBooks in all kinds of different network environments are always helpful to the community.
This guide was written for QuickBooks Desktop users (Pro, Premier, Enterprise) running on Windows. Some steps may vary slightly depending on your specific QuickBooks version and Windows version. Always back up your company file before making changes to your QuickBooks installation.